
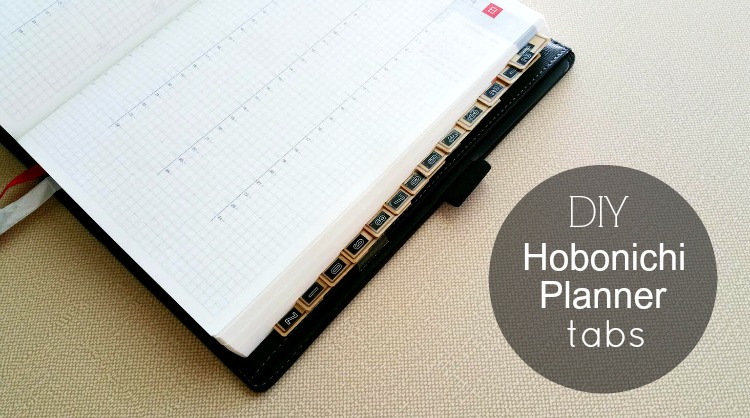
One thing I loved about the Mead daily planner were the monthly tabs. This made it easier to organize and flip through the sections within the notebook. Now that December is here, I've started transferring everything over to my new 2015 planner, the Hobonichi Techo.
(Originally, I planned on continuing on with the Mead planner, but I like how the Hobonichi grid paper allows for more writing space within the daily pages.)
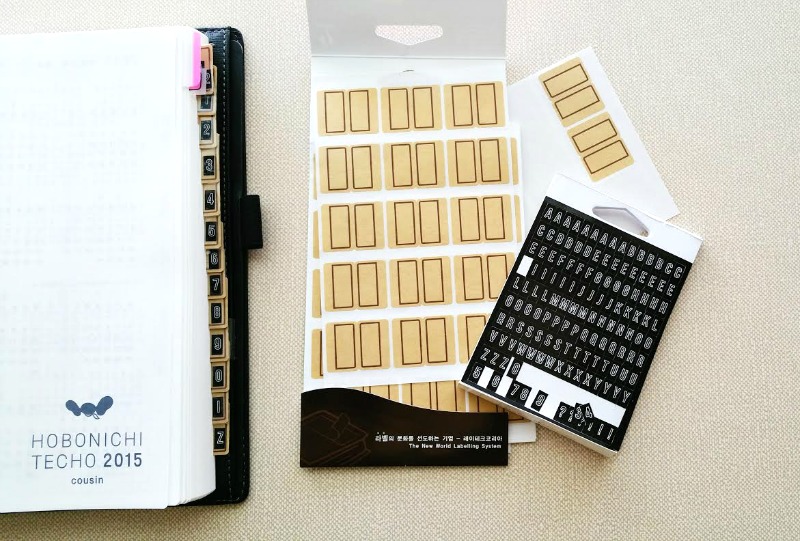
So, this planner originally doesn't come with any tabs, but I went and added my own with the above accessories, paper tabs and alpha stickers. Easy peasy!

To make sure the numbers stayed on the tabs, as I'm sure they'd fall off eventually, I used clear packing tab to laminate the individual tabs.
And there you have it!
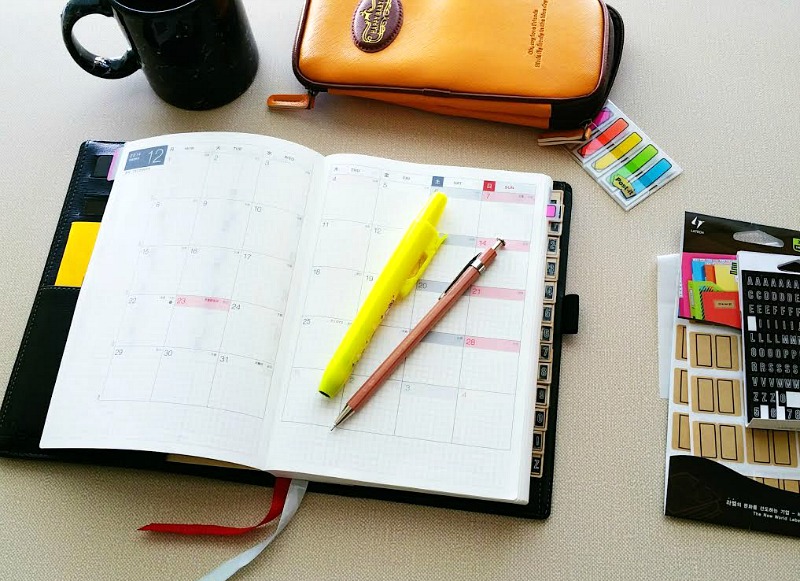
As the weeks and months pass by I'm sure I'll be adding more customizations, in which, have you noticed the two ribbons on the bottom? Yup, added those recently, too. I just taped (or you can glue) the two separate ribbons to the back of the Hobonichi cover. These will be used as page markers since my cover doesn't have any like my last one.
Anyone else switching over planners for 2015?
I'm excited to start using my Hobonichi today! I'm rather fond of the colored page sides for the months, but am disappointed that there are no tabs - this might be the way to go! I'm kicking myself for not getting a cover, though!!
ReplyDeleteYes, I like how each month has their own colored tab on the page, but physical tabs would be nice. And as far as a cover goes, you can find some basic ones at Barnes and Noble or even Target. They're a lot cheaper than the Hobonichi brand.
Delete